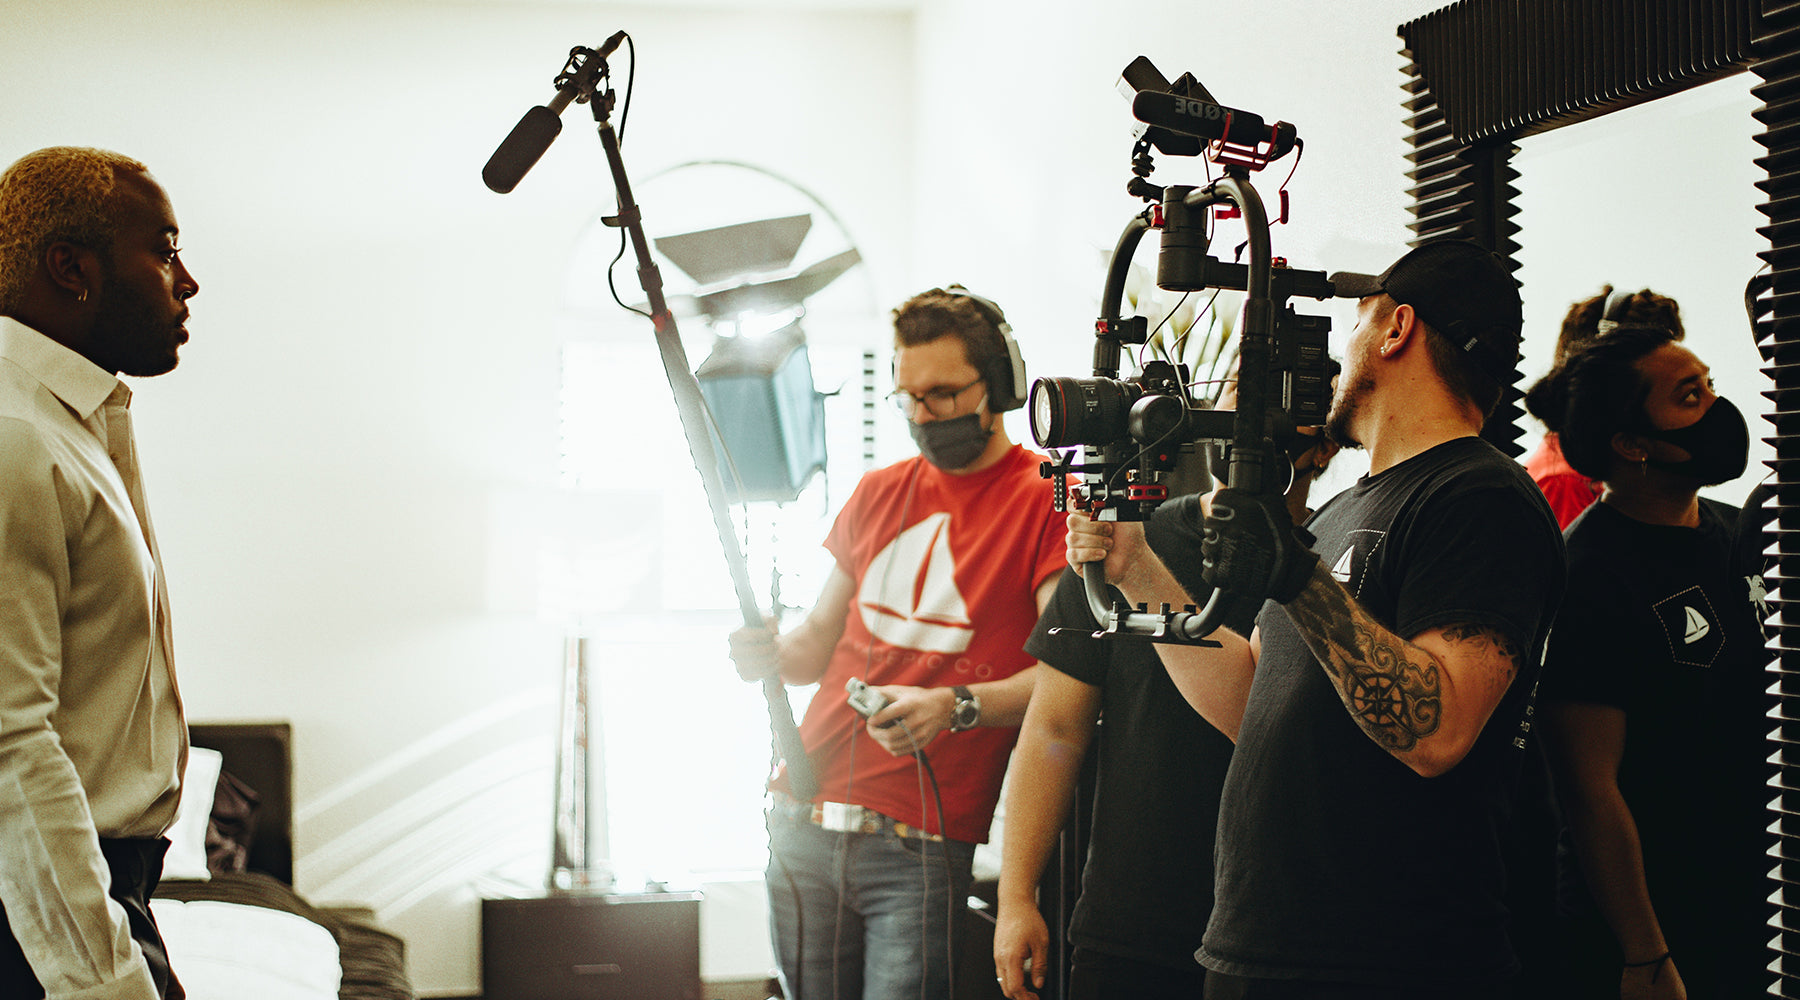
Audio is an essential component of any film or television production. Whether you’re shooting a feature film, documentary, or TV show, capturing clean and clear audio is vital for the success of your project. In this beginner’s guide, we’ll explore the basics of recording audio for film and television.
Know your equipment
The first step in recording high-quality audio is understanding your equipment. Make sure you know how to use your microphones, recorders, and other audio gear before you start recording.
Microphones
Selecting the right microphone for the job is crucial to capturing clear and accurate sound. There are different types of microphones, including dynamic, condenser, and shotgun microphones, each with its own unique features and benefits.
-
Rifle Microphone (Shotgun Microphone):
A rifle microphone, also known as a shotgun microphone, is a highly directional microphone designed to capture sound from a specific direction while minimizing background noise. It has a long, narrow pick-up pattern and is often used in outdoor and on-location shooting. Rifle microphones are ideal for capturing dialogue, interviews, and ambient sounds with precision.
-
Handheld Microphone:
Handheld microphones are versatile and widely used in film production. They offer good sound quality and are suitable for capturing interviews, live performances, and on-the-go recording. Handheld microphones provide flexibility and control, allowing the user to position the microphone close to the sound source and easily adjust the angle and distance.
-
Lavalier Microphone (Lav Mic):
Lavalier microphones are small, clip-on microphones that can be discreetly attached to a person's clothing, typically near the collar or lapel. They are commonly used in film and television production to capture clear and consistent audio in situations where a handheld or rifle microphone might be impractical or visually intrusive. Lav mics are often employed for capturing dialogue in interviews, documentaries, and scenes requiring freedom of movement.
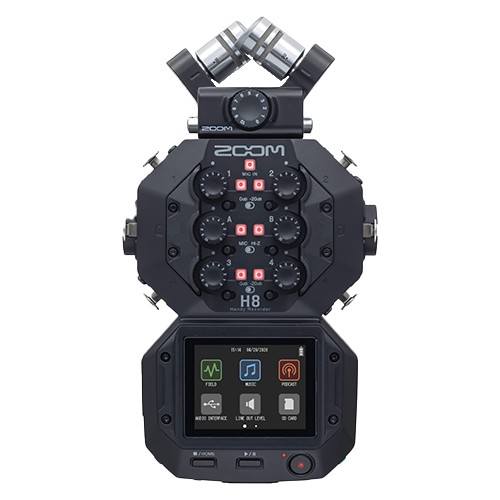
Recorders
A portable audio recorder is an essential tool for recording audio in film production. It allows you to capture high-quality sound directly on location, giving you more control over the audio recording process. Here are some reasons why a portable audio recorder is important:
-
Flexibility and Mobility:
Portable recorders are designed to be lightweight and easy to carry, allowing you to move around freely while recording audio. They offer flexibility in terms of placement and positioning, ensuring that you can capture the best sound from different angles and distances.
-
High-Quality Audio:
Portable audio recorders are equipped with advanced preamps and converters that provide excellent sound quality. They can record audio in various formats and bit depths, allowing for professional-grade recordings. This is crucial in maintaining the integrity and clarity of the audio during the filmmaking process.
-
Multi-Track Recording:
Many portable recorders, including the Zoom H8, offer the capability to record multiple tracks simultaneously. This feature is incredibly useful in film production, as it allows you to capture different audio sources separately. For example, you can record dialogue, ambient sound, and background music on separate tracks, giving you more control during the post-production process.
-
External Microphone Support:
Portable recorders typically have built-in microphone inputs and offer the option to connect external microphones. This versatility allows you to use a wide range of microphones based on your specific recording needs. For instance, you can connect shotgun microphones, lavalier mics, or even studio-quality condenser microphones to achieve the desired audio capture.
-
Monitoring and Control:
Portable audio recorders provide headphone jacks for real-time monitoring of the recorded audio. This allows you to ensure that the audio levels are correct and there are no issues with the recording. Additionally, they offer manual controls for adjusting gain, setting recording levels, and applying filters or effects to optimize the audio capture.
Overall, a portable audio recorder empowers filmmakers to capture high-quality sound on location, ensuring that the audio matches the visual elements of the film. It offers flexibility, control, and the ability to capture multiple audio sources simultaneously, enhancing the overall production value of the film.
Remember to explore different models and brands of portable audio recorders to find the one that best suits your needs and budget.
Set up your recording environment
Create a quiet and controlled recording environment to minimize unwanted noise and interference. Consider using sound blankets, acoustic panels, or other soundproofing materials to reduce background noise, dampen echoes and reduce sharp sounds. Keep in mind that every sound recorded should have an intended purpose, outside noises will only distract from your main auditory focus point if not managed correctly.
Wind noise can be a major problem when recording outdoors. Use wind protection such as wind shields or blimps to minimize wind noise and protect your microphone from wind damage.
Position your microphone correctly
Microphone placement is critical to achieving the desired sound quality. Experiment with different microphone positions until you find the perfect placement for your shot.
Rifle Microphone (Shotgun Microphone):
- Position the rifle microphone above or below the frame of the camera, pointing toward the sound source.
- Aim the microphone directly at the desired sound source while avoiding capturing excessive background noise.
- Adjust the distance based on the desired audio perspective. A closer placement provides more direct and focused sound, while a farther placement captures a wider sound field.
- In outdoor environments, be mindful of wind noise and consider using a windscreen or a furry wind cover to minimize disturbances.
Handheld Microphone:
- Hold the handheld microphone close to the sound source, such as the speaker's mouth or the musical instrument being played.
- Maintain a consistent distance to ensure a balanced audio level and clarity.
- Angle the microphone slightly off-axis to minimize plosive sounds (pops) and sibilance.
Lavalier Microphone (Lav Mic):
- Attach the lavalier microphone to the subject's clothing, typically near the chest or collar.
- Position the microphone in a way that it faces the person's mouth while maintaining a suitable distance (usually a few inches) to ensure clear and intelligible speech.
- Conceal the microphone as much as possible while ensuring it remains unobstructed and free from rubbing against clothing or other objects.
Monitor your audio levels
Always monitor your audio levels during recording to ensure that your audio levels are neither too high nor too low, peaks between -6 to -12 dB are good practice; anything outside that range may distort - too high, and you clip, too low, and you need to boost in post creating noise. Use headphones to monitor the sound quality and ensure that the levels remain consistent throughout the shoot.
Using low-cut filters, limiters, and dual recordings can significantly enhance your audio quality and provide additional safeguards during the recording process. Here's a breakdown of these features and how they can benefit your audio capture:
Low-Cut Filters
- Low-cut filters, also known as high-pass filters, are used to reduce or eliminate low-frequency sounds below a certain cutoff point.
- They are particularly useful for mitigating rumble, handling noise, wind noise, and other unwanted low-frequency vibrations that can be picked up by microphones.
- When recording dialogue or other focused sound sources, applying a low-cut filter can help clean up the audio and make it more intelligible.
- The specific cutoff frequency may vary depending on the microphone and the recording environment, so it's important to experiment and adjust accordingly.
Limiters
- Limiters are audio processors that help control and prevent audio signals from exceeding a certain level, usually the maximum acceptable level, known as the "ceiling."
- They act as a safety net by automatically reducing the gain of the audio signal when it reaches or exceeds the specified threshold.
- Limiters are especially useful in situations where unexpected loud sounds or audio peaks may occur, preventing distortion and clipping.
- They help maintain a consistent and controlled audio level, particularly in dynamic recording scenarios such as interviews or live performances.
- However, it's important to set the limiter threshold carefully to avoid excessive compression or artifacts that can adversely affect the audio quality.
Dual Recordings
- Dual recording involves simultaneously capturing two separate audio tracks at different gain levels or with different microphones.
- It serves as a backup and provides options for post-production adjustments and flexibility.
- One track can be recorded at a lower gain or with a safety track, acting as a precaution against sudden volume spikes or clipping.
- The other track can be recorded at the optimal gain level for capturing the desired sound.
- Dual recordings provide a safety net in case one track suffers from technical issues, distortion, or unexpected noise, allowing you to rely on the cleaner backup track for critical sections or important dialogue.
Utilizing these features in your recording workflow can help you improve audio quality, avoid technical issues, and provide more control during post-production. However, it's important to note that the availability of these features may vary depending on the specific microphone, recorder, or audio equipment you are using. Be sure to familiarize yourself with the capabilities and settings of your equipment to make the most of these tools.
Record room tone
Room tone is the ambient sound of a recording environment. Record room tone before and after each shoot to help with post-production sound editing.
Use proper file formats
Select the appropriate file format for your project, depending on the specifications of your camera or editing software. Common file formats include WAV, MP3, and AAC. You will want to use WAV with a minimum of 48kHz and 16-bit to ensure the best quality.
Keep backup copies of your recordings
Always make backup copies of your audio recordings to avoid the risk of losing any important data.
Wrapping up...
Recording high-quality audio for film and television can be challenging, but by following these simple tips, you can ensure that your audio is clean and clear. Remember, audio is just as important as video in the production process, so take the time to get it right.